
Create Template
1️⃣ WhatsApp Template Categories (As Per Meta)
Meta allows only 3 approved categories:
🔹 1. Marketing
Used for:
Promotions
Offers / Discounts
Product announcements
Retargeting campaigns
Abandoned cart reminders (promotional tone)
Example:
Hi {{1}}, get 20% off on your next order. Use code SAVE20.
⚠ Requires user opt-in. Strict content moderation.
🔹 2. Utility
Used for:
Order confirmation
Invoice
Shipping update
Appointment reminder
Payment confirmation
Account updates
Example:
Hi {{1}}, your order {{2}} has been shipped.
Most commonly approved category.
🔹 3. Authentication
Used only for:
OTP
Login verification
2FA codes
Example:
Your verification code is {{1}}. It expires in 5 minutes.
⚠ Cannot contain promotional content.
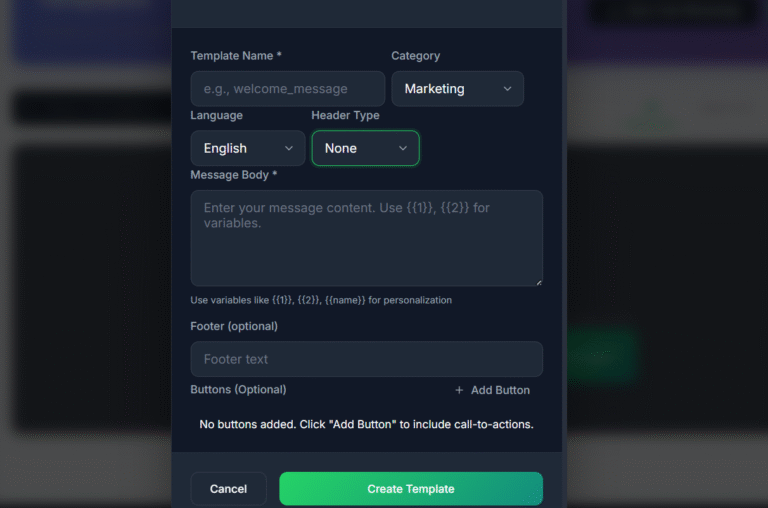
2️⃣ Step-by-Step: How to Create Template (Based on Your Dashboard UI)
✅ Step 1: Enter Template Name
Use lowercase
No spaces (use underscore)
Example:
order_confirmationotp_verificationoffer_campaign_jan
Rules:
Must be unique
Cannot be edited after submission
✅ Step 2: Select Category
Choose one:
Marketing
Utility
Authentication
⚠ Choose carefully — wrong category causes rejection.
✅ Step 3: Select Language
Choose the primary language of your message:
English
Hindi
Spanish
etc.
Each language version must be created separately.
✅ Step 4: Select Header Type
Options:
| Header Type | Usage |
|---|---|
| None | No header |
| Text | Short bold title |
| Image | Banner image |
| Video | Promotional video |
| Document | PDF invoice, etc |
Examples:
Text Header
Order Update
Image Header
Used for marketing promotions.
⚠ Media headers require sample media during approval.
✅ Step 5: Write Message Body (Required)
Use variables like:
{{1}}{{2}}{{name}}(if supported in your system)
Example (Utility):
Hi {{1}},

Your order {{2}} worth ₹{{3}} has been confirmed.
Important Rules:
Variables must be sequential ({{1}}, {{2}})
Do not skip numbers
Do not use too many variables unnecessarily
No URLs in authentication templates
✅ Step 6: Add Footer (Optional)
Short disclaimer or brand name.
Example:
Thank you for shopping with us.
Limit: 60 characters.
✅ Step 7: Add Buttons (Optional)
Click “Add Button”.
Types:
🔹 Quick Reply
Confirm
Cancel
Yes / No
🔹 Call To Action
Visit Website
Call Phone Number
Example:
Button 1: Track Order
Button 2: Visit Store
⚠ Authentication templates have limited button options.
✅ Step 8: Click “Create Template”
After submission:
Status: Pending
Reviewed by Meta
Approval time: Few minutes to 24 hours
You must wait for approval before sending.